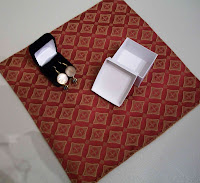
 This week I had fun redesigning one of our best sellers, the furoshiki. Last year these made the front page of etsy and after this past christmas season
  I wanted to give it a few upgrades and simplify the process to hopefully make this as easy as tying your shoes.
As a background furoshikis have been around since the 12th century, originally as a method of wrapping bridal gifts, they became common in the 18th century as an economical way of taking lunches to work and school. We have 4 basic
 sizes, x-small which is perfect for wrapping gift cards and small gifts such an earring card. Think credit card size and you have it. Small is jewelry sized for a standard ring/earring box; medium is for packed lunches (bentos) or a hard cover book; and large is big enough for an average shirt box. We have a variety of colors and each one is lined.
 Alright to start wrapping your present, we have a small furoshiki for jewelry and earrings as a model.
1. First, put your jewelry in the box (see picture on right).
2. Next, place the furoshiki with the label facing you so you can read it. The bottom point should be facing your belly button (see picture on left).
3. Put the box squarely on top of the label.


4. Take the bottom corner and fold it towards the top. You can tuck the corner if it goes past the box (See picture on right).
 5. Take the top corner and fold it down towards you. You tuck the corner under for smooth look.
At this point you should see your furoshiki looking like a burrito (See picture on left).

6. Alright, last part. Channel your five year old self, tying your shoes for the first time. Take the left and right sides, bring them to the top and tie a basic knot. If there's a lot of extra or you want to make super sure your little kid brother can't get in, make it a double-knot, but I normally find the friction involved will hold a single knot just fine (See picture on right).
7. Voila you're done.


Easy right? You can also reverse it if you prefer the other color side. Alright, well....that's our newly updated product for the week. Check back next week for new purse styles.
 You can check out our etsy shop for various looks and styles:
http://www.etsy.com/shop/lisashay
No comments:
Post a Comment