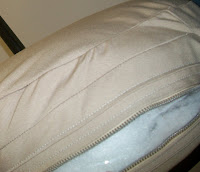
Hi, welcome back everyone. We had a great weekend raising money for the Red Cross downtown at the Raleigh Convention Center. We raised over $300 to support Japan relief which was awesome! I am editing pictures to post in the next few days. Today we are discussing custom wallets. The idea for this sprang out of a lunch discussion one day over what makes the perfect wallet. We all went around the table listing different things we loved in a wallet. The perfect number of pockets, the right color, the weight, photos of loved ones, slices of memories folded into each layer. The interesting thing was at the end, while many people agreed on the important features for them and many of them overlapped, they weren't the same. It's often easy to find the right style or the right fabric/print, but not both. And preferences tended to change based on what you wanted to use your wallet for.
We all concluded that the perfect wallet is one that fits a person's needs and it was why many people spend so much thought on a piece that ideally lasts them years. It was also why over time, a person's perfect wallet may change. Some similarities emerged, a perfect wallet must have enough pockets, be lightweight and easily fit in a back pocket, be durable, and fit the personality of person involved. At the end of the lunch we all laughed, Matt and I thought this was too fun of an idea not to make real. After all, we are in the business of making dreams real everyday. He can print anything on fabric or leather, and I can sew it. Now you can own one.
You can purchase one as a reward on our Kickstarter campaign for $50.00: http://www.kickstarter.com/projects/lisashay/walking-in-your-dreams
Tuesday, May 31, 2011
Friday, May 27, 2011
Memorial Weekend!
Happy Friday Everyone! We hope you are off spending the weekend with the ones you love. A huge thanks to the men in our families who have supported us and protected our freedoms. Also, to our female friends who have served in the military. We are closing up shop to enjoy the people in our life and will reopen on Tuesday with Day Sixteen. If you get a chance, you can join us Saturday in downtown Raleigh at Animazement where I will be giving an artist lecture on silk painting to raise money for Japan relief from 3-5 pm. Tickets are $15 at the door plus a one day pass.
http://animazement.org/2011-art-room-events/
Also, some people have asked, we are posting our 40 Days of Summer Monday through Thursday over the summer so both our blog and Kickstarter Campaign are slated to end the same day. We are closing for weekends and holidays as we find few people read the blog then so it doesn't really make sense to post then.
Thursday, May 26, 2011
Day Fifteen: Gorilla Knitting
Today we're relaxing and having fun with our Etsy meet-up group. All of us headed over to the big red truck that sits in front of Techshop on our lunch break. A couple weeks ago some of us heard on NPR about a new craze in big cities called Gorilla Knitting where people make knitted goods to put on statues or sidewalks to help beautify them. We heard Alison Stewart talking about the Bryant Park Project. You can see various youtube footage of people sneaking out during lunch breaks or late at night to add a little warmth to their city.
Our etsy group thought that it would be fun to do on our big red truck. We used fun hand-knit blue scarves to give our truck two giant mischievous mustaches. A lot of my job is serious filling orders for clients so it's good to relax occasionally. There's a knitting circle up the street from me that meets every Weds at lunch for 2 hrs. at Loco Lu's from 1-3. It's a great place to sit for an hour and work on a project. If you haven't been I invite you to drop by.
Our next Etsy Meet-up is June 14th from 7-10 pm at Techshop. It's a great place to meet fellow Etsians and share tools and tricks of the trade for what does and doesn't work. Meetings are the second Tuesday of every month and feature snacks, a guest speaker, and craft exchange. Everyone is welcome. We look forward to seeing you there one day soon.
Please continue to support our Kickstarter campaign: http://www.kickstarter.com/projects/lisashay/walking-in-your-dreams
Wednesday, May 25, 2011
Day Fourteen: Custom Printed Fabric Belts
Today we are focusing on printed belts. We meant to post this earlier in the week, but had some last minute fabric printing jobs come up for a client.
Fabric printed belts are a wonderful custom look for an event or memory that can be used every day. Matt likes to print logos and pictures at an angle. This is an example of the Kickstarter logo in belt form. I'm partial to D-rings on woven belts with a metal ending at the end. You can get your own belt from our Kickstarter campaign with a $20 reward pledge.
We hope you enjoy. Please check-out our Kickstarter campaign:http://www.kickstarter.com/projects/lisashay/walking-in-your-dreams. It launched today.
Tuesday, May 24, 2011
Day Thirteen: Custom Dying Leather Labels
I was reminded by the interns that we actually do a third type of fabric/leather finish which is dying. Today we are going to show you taking our standard natural leather labels and dying/finishing them for a client who wanted a particular color with a waterproof finish. Our printer is running a last minute job for a client today so you can see the printed fabric belt hopefully tomorrow.
Ella, our new intern is in the photos. Dye can be applied in a number of ways: painted or vat/dipped dyes are the two of our most popular. You can also do other ones such as stamped, screen-printed, rolled, etc. Pictured here is leather dye which is hand-painted on and then allowed to dry for 7-72 hours before it has a top finish applied. You generally see the final color roughly a week after you first dye them so I like to give them time to stabilize. We have 150 custom colors and can generally match a specific Pantone color within 4 shades if you need it. This is a popular request for limited edition pieces or items that are unique.
There are 2 important things to remember when dealing with dying. One, each piece if hand-painted will be unique and vary slightly from the others. And two, vat dyes are different each lot. This is true even with the big fabric houses so if you are ordering fabric or leather, it pays to either be able to order all of one fabric at a time or from the same lot. Have a great day. We look forward to having you check back tomorrow.
Monday, May 23, 2011
Day Twelve: Rebellious Brewing Leather Style
Welcome back from the weekend everyone! It's Monday and I hope you have had a good week. Today we're headed over to our favorite local brewers, ROTH Brewing Company. For those of you in the Triangle, we hope you have gotten to try this deliciously made microbrew. They're a beloved favorite of the guys at my design shop as a place to go after work on Fridays. A place to kick back and have a beer with friends. You can't help but love the owners easy charm. Two guys who are clearly doing this for the love.
They're getting ready to celebrate their Anniversary June 11th. I invite you to drop by and sample some beers. This is a prototype for their limited edition growlers, the final one will be available in a few weeks. You can clearly see the engraved leather and lettering. The lettering came out much better than expected. Have a great day everyone and see you tomorrow.
http://www.rothbrewing.com/home.shtml
Friday, May 20, 2011
Day Eleven: Momogrammed Fabric Belts
Happy Friday everyone. Over the next two days we're going to cover two major fabric designs we do in house. The first is monogramming (machine embroidery) and the second is fabric printing. To help show the differences between the two, I am showing both of them in belt form. Fabric belts are generally constructed with a belt buckle, fabric, and interfacing. If you use a metal belt buckle add grommets to reinforce the fabric.
I like to do monograms of 9-10 letters in the back for Belts. Today we're doing the company name, Li Sashay. Enter the name or design in the computer and print. We sew the belt together, top-stitch to add stability/durability, and add a buckle. I'm a big believer in top-stitching in belts as it tends to make them last 3-4 times long. An extra step, but a worthwhile one. The buckle can be a simple clip like the one a friend gave me here for a camera strap or a more complicated metal buckle on Monday.
Have a great weekend. We will see you on Monday.
Thursday, May 19, 2011
Day Ten: Silk Painting for Japan
Today, we're chatting about a guest artist lecture event you can participate in next Sat, May 27th from 3-5 pm in the afternoon. As some of you know, I love asian cooking. It's great for eating healthy on a budget of both time and money. One of my favorite things to do is pack healthy lunches for myself and those I love. Bentos come in a variety of sizes and shapes, my favorite are the square ones you can wrap in furoshiki cloths and stick chopsticks through. We will be hand-painting silk furoshiki on site to raise money for Japan.
Please come and make one with us, we will have silk blanks and paints available. We will have print outs of traditional patterns for you to trace or you can make your own.
All proceeds go to support Japan disaster relief. A big thank you to the staff at Animazement for putting this event together.
http://www.animazement.com/
If you did not get a chance to attend the event because we sold out all sessions, you may purchase your own kit on etsy for $20: http://www.etsy.com/listing/75195694/paint-your-own-furoshiki-kit
You may purchase the kit on sale on kickstarter for $15 through July 4th: http://www.kickstarter.com/projects/lisashay/walking-in-your-dreams
Wednesday, May 18, 2011
Day Nine: Antique Necklaces
Today's post is to showcase the great wire wrapped jewelry of our jewelry designer, Nash Page. You may have seen some of his work our local stores or exhibits. Nash is a local metal and wood worker who enjoys combining his passion for creation on small and large scale. This season he is focusing on summer blues and whites as he dreams of crisp water retreats from our hot North Carolina summer. I encourage you to follow him on etsy or visit Loco Lu's Coffeehouse to see more of his work.
Have a great day everyone. Tomorrow we are teaming up with a local brewery.
Tuesday, May 17, 2011
Day Eight: Hines Design Labs Pants
These fun pants were a commission for Maker-Faire by Hines Design Labs in Virginia. Angus is a lot of fun and a fellow partner-in-crime. He commissioned the cotton fabric from Spoonflower several months ago before Matt was up and running. Spoonflower is a great local fabric printing lab if you have never been, I encourage you to drop by their place one day. We had a lot of fun Sat cutting them out and sewing them together. They looked pretty good when all was said and done. A little bold, but hey....it's Maker-Faire. Over the top is expected. The bottom hems were left undone, we're going to wash them a couple of times to get the fit perfect before we put them on. You can see the finished product June 18th on the man himself at his booth.
And now for the awesome part, we had a couple yards of fabric left-over which is where the Maker-Faire hats and messenger bag came in. Please thank Angus for an awesome job and feel free to drop by his design studio sometime.
Monday, May 16, 2011
Day Seven: On the Battlefield with Blocklets
Today, we are blowing stuff up on the battlefield of Blocklets. Nash, our jewelry (metal and wood) designer helped with the designers of Blocklets to make fun with Trebuchets using wood and red leather. The leather came from our studio.
Originally, we came up with the idea for joint collaborations of red leather blocklets for the Red Cross which will be available as sculpture at Maker-Faire. However, throw a couple of geeks together in a room, and you also see neat stuff like models for launching blocklets across the room with Arduino electronics. Mark and Gabe have worked really hard and are nearing the end of their successful Kickstarter campaign, please feel free to check them out on Wired and a variety of other media outlets. You can order one of your own kits online: http://www.kickstarter.com/projects/blocklets/blocklets-make-anything
The money they raise is going to open a local design studio in Raleigh, NC. These are locally manufactured in the US. Proving, it's never to late to dream.
Thursday, May 12, 2011
Day Six: Bedroom Curtains
Hi, this is a cross-over post between Li Sashay and 50firstcrafts. Each week, my friend Amber tackles a new art. This week features the art of sewing. We are tackling two types of curtains, your traditional drapes and a fancy Roman shade. These are slated to go over Amber's plush king-sized bed. I'm a big believer in curtains as they reduce energy costs on a home or apartment. The typical value is around 30%. This can save you several hundred dollars a year making it a very practical investment. If you have curtains, you have the added bonus of protecting your decor from fading due to UV rays.
Curtains are not an all-purpose fix-it, but they are great addition to any home. The most important part to making good curtains is a tape measure. Accurate measurements are the secret to great curtains. Many curtains feature repeating patterns or must be divided up in a specific manner to look right. The rules are not complicated, but they must be consistently followed.
Part One: Making Drapes
Amber laid out the fabric that she wanted for her curtains. We measured, marked, then cut out. As with all fabric projects for large projects, typical patterns are cut 3-4 inches over the measurements to allow for shrinkage. Drapes are generally made like giant pillowcases. The pieces are assembled inside out with the front being the curtain fabric and the back being the lining. My favorite lining is blackout fabric, which you can purchase at most fabric stores. If you are making a sleeve at the top, you can make this next with a double-folded piece of fabric that is made to fit a dowel or hanging bar. Turn the sleeve inside out. You can use a coat hanger or pencil for this part. There's actually a sleeve-turner that looks like a long coat hanger with a catch at the end which is normally in the notions section and should run you $1-3. It's a handy tool to have, but a pen or pencil works fine. Sew the curtain body to the sleeve (some people do this first).
Leave a space to turn your project. I like to leave at least 4-8 inches on one of the sides. Some people like to put their turns on the top or bottom, but I like to use sides as they seem to be less resistant to gravity.
Part Two: Making Roman Blinds
There are 3 major types of Roman Blinds, the most popular for it's sleek contemporary look is the kind we went with: slotted.
They're much easier to sew and you can find online directions: http://www.readymade.com/blog/home-and-garden/2010/02/10/from-bland-to-blinding-how-to-make-roman-shades
As with all beginning sewing projects, a little patience goes a long way. Have a great weekend. Blogger has been having posting problems so we are taking the weekend off and will resume our 40 days of summer on Mon.
Tuesday, May 10, 2011
Day Five: Hats off to Maker-Faire!
Cat tested. Artist approved. These fun new Maker-Faire bucket hats and messenger bags are part of a joint project between John Danforth of Maker-Faire North Carolina and Li Sashay. We tested them on our kitten and she thought they were sweet. This is a great example of printed fabric which I am in love with as it takes classic items and makes them personal. We are giving away 2 this week to the first people who comment on this post. You can pick it up at the Li Sashay booth! Have a great day.
Monday, May 9, 2011
Day Four: Windpower
One of my favorite designs I get to show over these 40 days, is a project for Windlift. If you're not familar with Windlift, they are an amazing company that works on providing energy through renewable resources, namely wind with kites. They are both super smart inventors and you can spend hours having them chat with you. The concept is dead simple. Portable kites as wind generators in remote locations.
There's a lot of math involved with what they do, so I will just simplify it by saying we come in on the fabric side of house.This is a working prototype sewn together out of wetsuit material to hold the control box. I wanted to show this design as it's not something people normally think about fabric doing, making the environment a cleaner, brighter place. I hope to see these kites tugging above disaster relief areas fueling aid hospitals one day. So far it's working great and I look forward to many more cool projects they bring across my desk.
Please feel free to check out their website: www.windlift.com or go with them on one of their weekly test launches. I really respect and admire the hard work these guys do for all of us.
Sunday, May 8, 2011
Day Three: Design A Class
Yesterday, the Durham Scrap Exchange kindly hosted Li Sashay for our first time teaching a Basic Mending and Alterations with the help of Rowan Martell, their red-headed fun events coordinator. If you've never been to the Scrap Exchange, it's a wonderful artist paradise that focuses on recycling and reusing. They helped me a lot when I was first starting out and it was fun to give back.
All proceeds from the class fees went directly to support the community. After talking it over, we (Please read Rowan and the amazing staff did the heavy lifting) came up with this class as a way to teach women in the community learn how to repair and alter their clothing to save and look better. We had 5 lovely women in our first class, all from different walks of life. Everything from a cop to a librarian to a computer geek.
Over 3 hrs. we got to teach them the basics behind quick and dirty mending and alterations. They learned how to sew on buttons, use fabric fusible interfacing to do instant patches, and hemming/taking in sides on their sewing machines. I can't wait to see what they will make. The whole group was talented and really made me smile.
I loved getting to hear the projects each woman intended to do. One woman was excited at the idea of fixing her husband's soldier uniforms as he is always ripping them. Another had a tote bag full of t-shirts she planned to shortened for her frame as her shirts were always too long. Two women came in to learn how to alter their clothes for their curvy frames. And the last one found herself forever trying to fix clothing to her taller frame without resorting to big and tall. Thank you all for coming. It was wonderful to meet you.
And a special thanks to the staff at the Scrap Exchange for hosting us and helping us design this project to help women succeed with fabric. Especially, thank you Rowan Martell, Julia Gartell, and Ruth Eckles.
Feel free to keep following us over the next 37 days.
Saturday, May 7, 2011
Day Two: Patio Seats
Today we're doing a fun project for one of our clients, Tom. Tom had an idea of an idea he wanted to try and pull off on his back porch since he and the wife had just finished a patio upgrade. He had a couple of patio chairs that needed to be given a make-over for his wife. This was a true labor of love and we couldn't resist helping him. Individual wooden seats had padding added. We cut over 50 layers plus batting building up the seats for an exact fit (thank you hot knives). We then sealed them in plastic, and then covered with fabric. Last, we biased cut the fabric and added zippers for easy cleaning (that pollen adds up around here). Viola.....2 custom chairs we hope he and his wife will enjoy for a long time to come.
Please feel free to follow us on our blog or donate on our Kickstarter page:
http://www.kickstarter.com/projects/lisashay/your-walk-your-dream
Friday, May 6, 2011
Day One: Dream Hats
One of my treasured designs for Kickstarter is our Dreams to Ideas Hats. Because everyone needs a thinking hat. A hat to see the world in. A hat to hold the world in. A hat to hide from the world and a hat to go exploring the great outdoors.
My favorite thing to do is go on walks with my boyfriend. We snap a leash on his dog, throw on some old tennis shoes and away we go. It's our quiet time to step together. To talk about the world, our dreams, and just the day in general. Because when you're young and broke, dreaming is free.
We do many wonderful things, but this one is hand's down my winner. You breath in the peace of the early morning when the air has lingering traces from the night's cool air. You hear the afternoon laughter from kids as they get off from class or sports activities riding their bikes and daring each other to the next big stunt. You feel the sun as it sets in the evening crisp on your skin.
While it's a lot of fun, I'm also Irish. Which means I look at the sun and BURN BABY BURN. Freckles at 14 are adorable, after 18....it's just painful. Hence, my idea...hat protection.
So I designed this to allow my great white escape. I hope it frees you too. That you get to wander summer's roads with me, a Nash, and a dog.
You need a hat light enough to be practical. Stain resistant. Squashed in your hobo bag for that last minute road trip. And because I wanted something that made me smile, I made them from locally recycled fabrics from trade shows in fun colors. Individually sewn, numbered, and signed. Add your name labeled on the inside just because it's your idea. Who knows when the next idea will strike? Or that recycling could be so much fun? Have a great weekend.
Sunday, May 1, 2011
40 Days of Summer
Wow, our blog is a year old. Li Sashay is celebrating with a number of local artistians, crafters, and businesses. 've launching our custom designs and growing to the next level of custom printed and designed art. Thank you so much for all support. It would not have been possible without each and every one of you. Starting Friday, we will be showing you daily design projects and rewards for 40 days to field test for our new design platform. The designs come from local artists and customers large and small. Check in each day to see what who we're working with and thank you for all your support.
Here's some behind the scenes photos for some of our upcoming posts. Check back later for more info.
Subscribe to:
Posts (Atom)